Automation Series allows you to manage multiple triggers in one setup for both email and…
How to connect to Yournotify SMTP using Python
Connecting to Yournotify SMTP using Python is important for reliable email delivery, customization, tracking, and security. Using Python’s versatility, you can easily create scripts to automate email-sending processes, manage email communication, and integrate email functionality into your projects. Here is how to connect to yournotify SMTP using Python.
STEP 1: Install Python: Ensure Python is installed on your system.
STEP 2: Create the Python script: Create a new Python script file in your project directory.
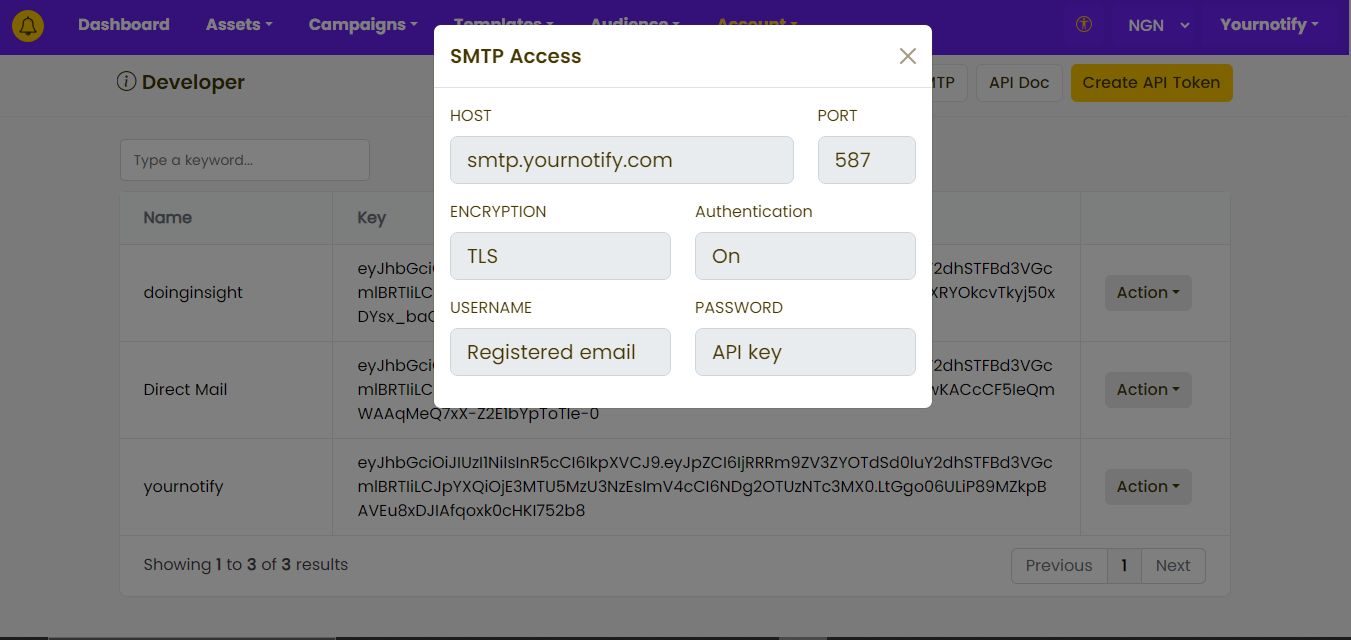
STEP 3: Generate the unique SMTP credentials: This includes the server address, port number, username, and password. These credentials will be essential for configuration.
STEP 4: Open the Python script in your preferred text editor and write the code for sending emails. Here’s a basic script to send emails using Yournotify SMTP

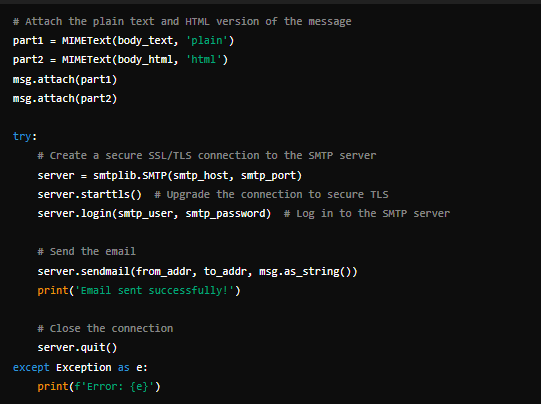
Email Configuration:
smtp_serveris set to'smtp.yournotify.com'smtp_portis the port number yournotify SMTP server uses (587 for TLS).smtp_userandsmtp_passwordare your email credentials used to authenticate yournotify SMTP server.
Email Details:
- Set
from_addrto your email address. - Set
to_addrto the recipient’s email address. - Set
subject,body_text, andbody_htmlfor the email content
For more information, please visit our FAQs section: Frequently asked questions
