Automation Series allows you to manage multiple triggers in one setup for both email and…
How to integrate SMTP with Yournotify on WordPress
SMTP servers are designed for sending emails reliably and efficiently. By integrating SMTP with Yournotify, you can ensure that important notifications, such as user registrations, password resets, and order confirmations, are delivered promptly and reliably to your users. Here is a guide on how to integrate SMTP with yournotify on WordPress.
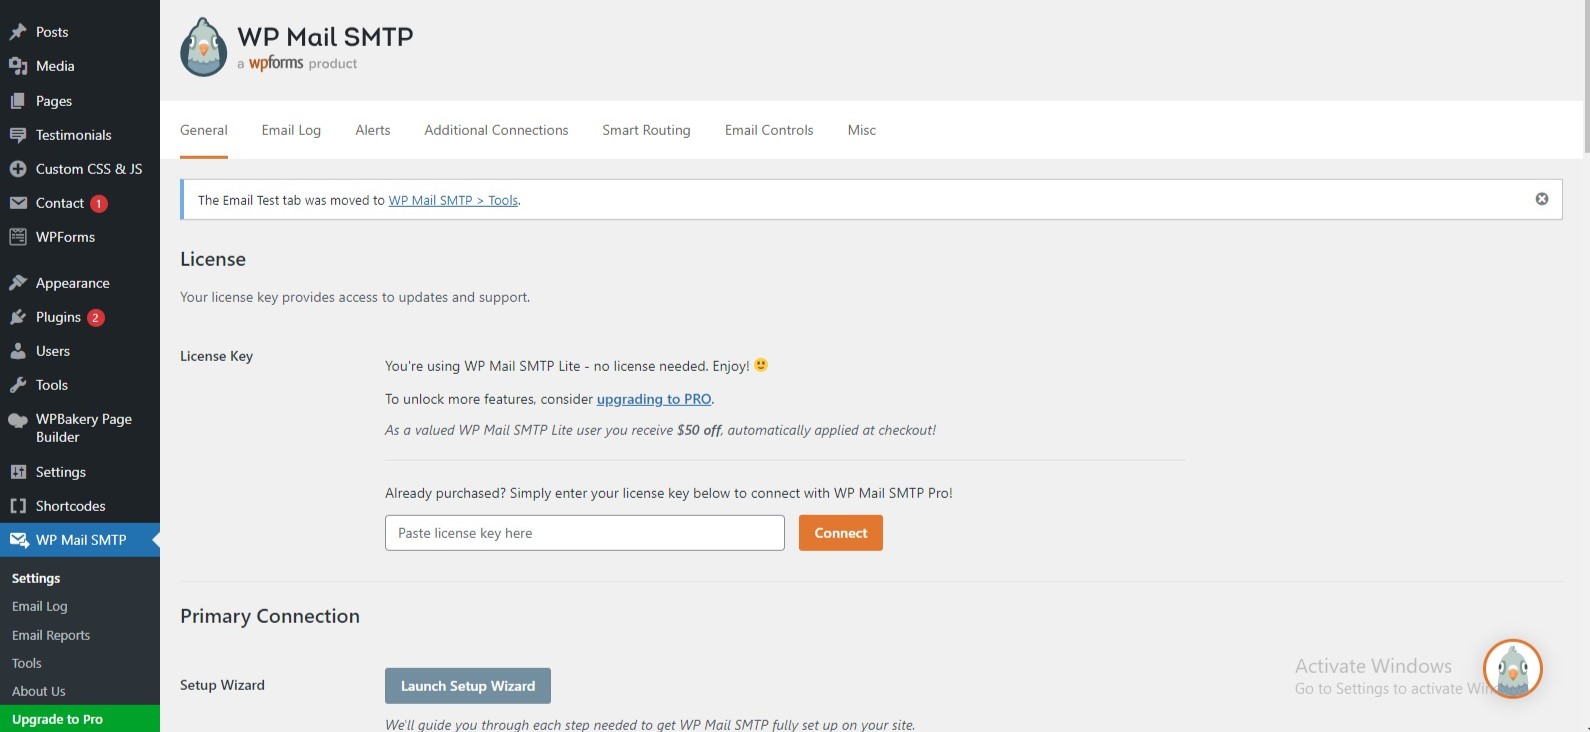
STEP 1: With the WP Mail SMTP plugin activated, navigate to your WordPress dashboard and Click “WP Mail SMTP” from the left-hand menu.
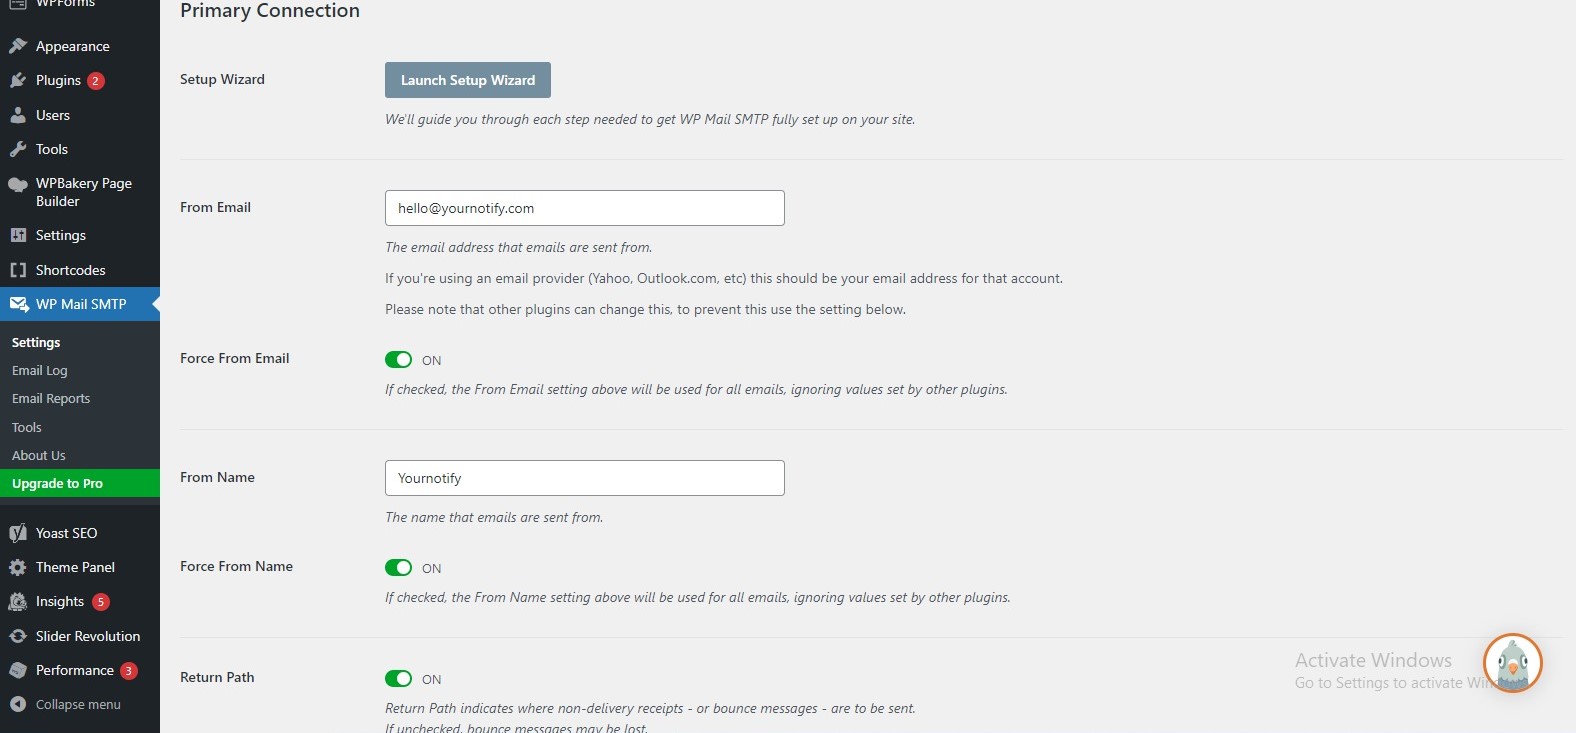
STEP 2: Refer to the information provided by Yournotify to fill in the details.
- From Email: This should be the email address from which your WordPress emails will be sent.
- From Name: Enter the name that will be displayed as the sender.
- Return Path: Check this box to receive delivery notifications or bounced messages.
STEP 3: Select “Other SMTP” as your mailer.
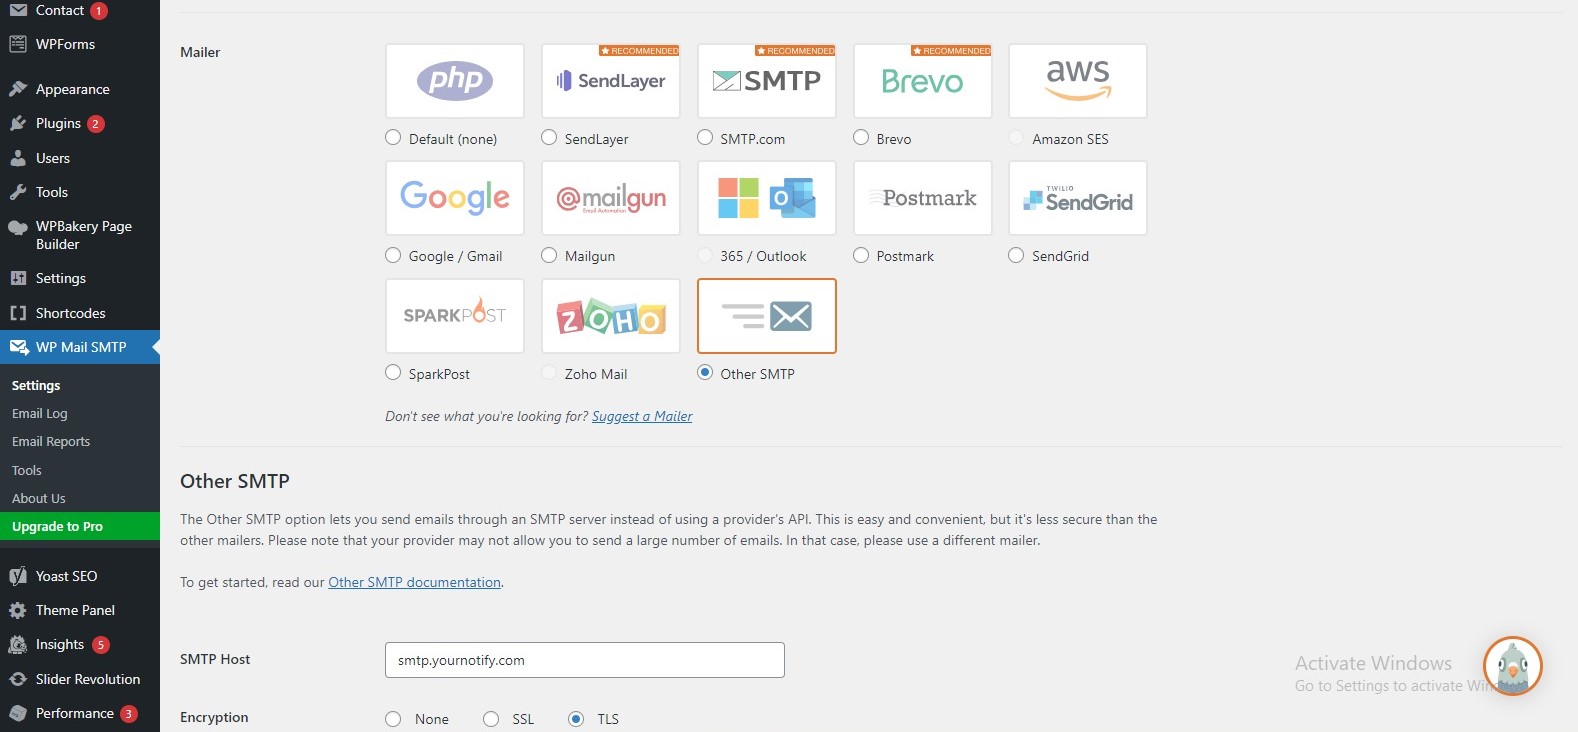
STEP 4: Enter the SMTP server settings provided by Yournotify.
SMTP Host: Enter the SMTP host address provided, which is typically “smtp.yournotify.com.”
Encryption: Choose “TLS” as the encryption method.
SMTP Port: Specify the port used by the outgoing mail server, which is usually “587”.
Authentication: Enable authentication by setting it to “ON”.
SMTP Username: Use the email address linked to your Yournotify account.
SMTP Password: For the SMTP password, utilize the API token that you’ve generated. This API token serves as your password for SMTP authentication.

With this setup, you can now enjoy reliable and secure email delivery, ensuring that your communication reaches its intended recipients without any hitches.
For more information, please visit our FAQs section: Frequently asked questions
