Email and OTP APIs connect your application to verification codes, receipts and account alerts. Yournotify handles message delivery while your backend confirms the underlying event, validates challenges and decides what the user can do next.
This guide shows how to organise those responsibilities with Yournotify’s Email and SMS APIs. It covers sender setup, sandbox requests, secure OTP handling, reliable retries, delivery reporting and a release checklist for developers building Nigerian or international applications.
Table of Contents
Connect email and OTP APIs to confirmed application events
Keep three concepts distinct: the event your application confirms, the message Yournotify accepts and the outcome the user completes. Each has a different source of truth.
| Journey | Application event | Message purpose | Completed outcome |
|---|---|---|---|
| Signup verification | A valid verification request | Deliver the current challenge | Backend validates and consumes that challenge |
| Purchase receipt | Confirmed payment | Explain what was paid and provide a reference | Receipt is available; purchase status remains owned by the store |
| Account change | A saved and authorised change | Notify the account holder | The change remains recorded in the application |
| Booking confirmation | A confirmed booking | Provide accurate booking details | Booking can be located and managed |
A successful send request must not mark an account verified or a payment successful. Those decisions belong in the application that knows whether the underlying condition has been satisfied.
A familiar product example
JumiaPay’s Nigerian FAQ describes purchase email notifications after confirmation. That is a useful design pattern for a receipt: connect the message to the confirmed transaction and give the recipient a recognisable reference.
For account access, Uber’s two-step verification guidance describes a text-message code delivered to the configured number. The application must still control the verification step. Apply the same separation in your own product rather than treating the messaging provider as the entire authentication system.
Model delivery and verification as separate states
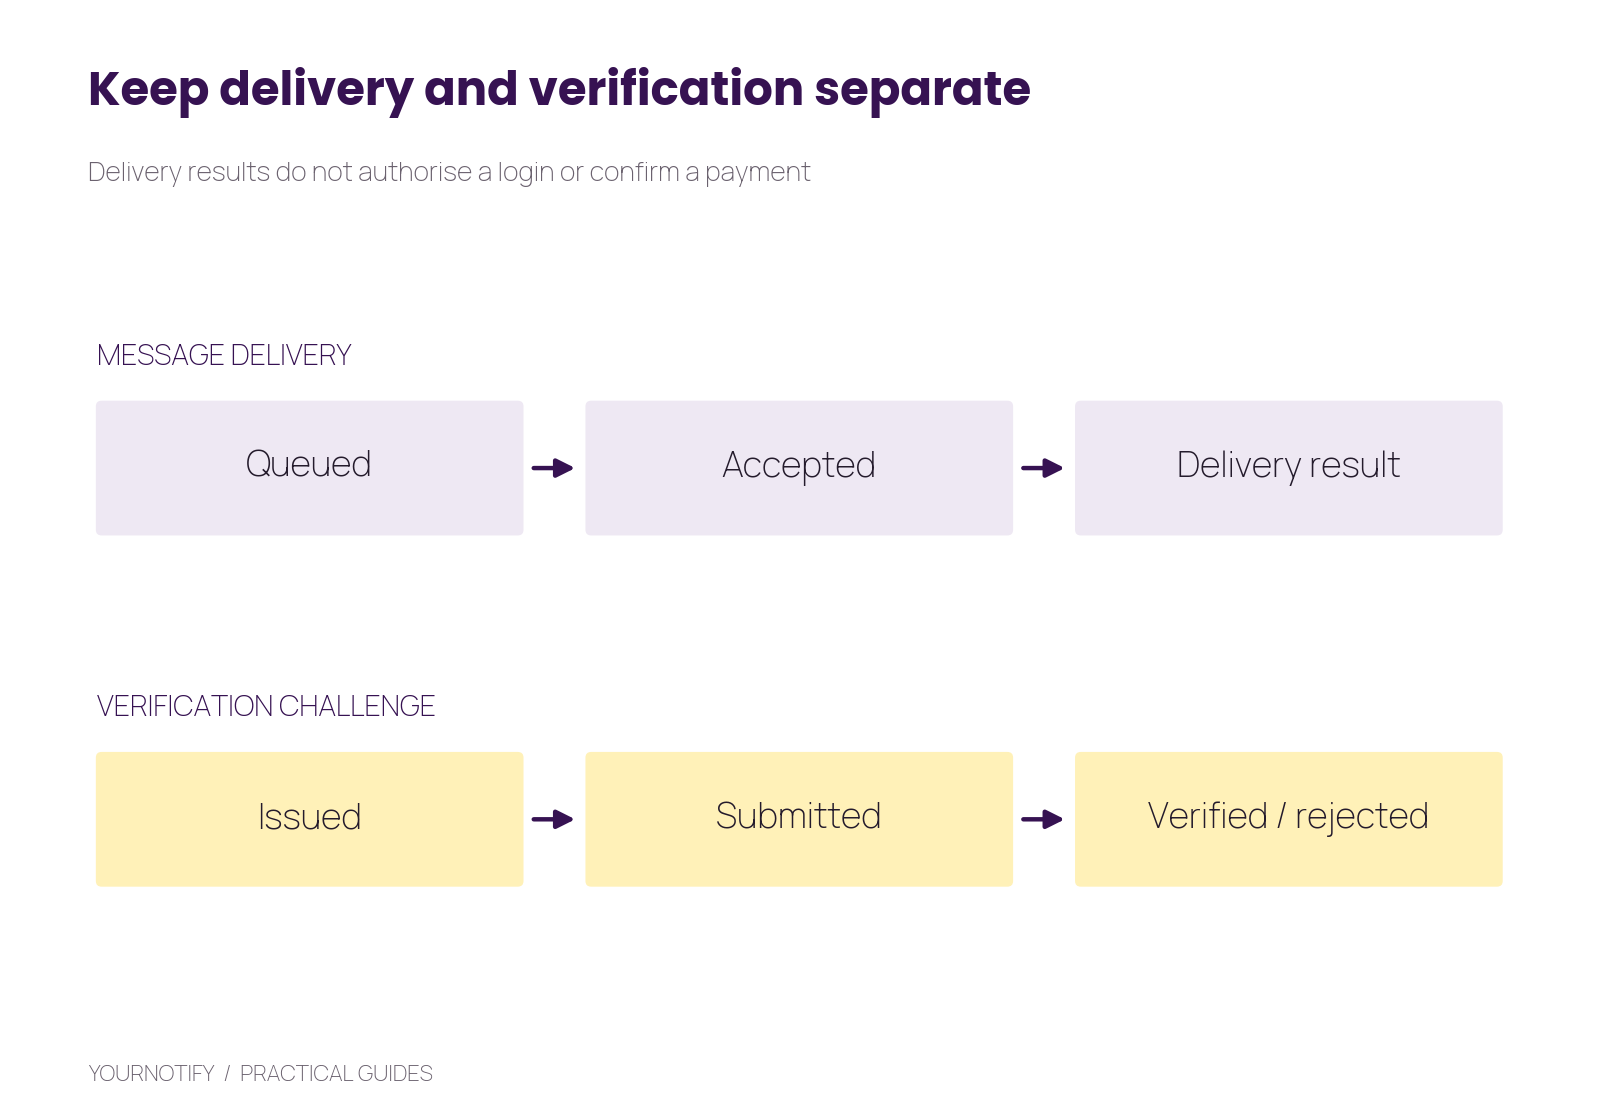
Messaging and authentication have separate state machines. A delivery callback can update message status; successful server-side challenge validation determines whether verification is complete.
For example, store a business-event reference, message reference and challenge reference where appropriate. This lets you investigate a failure without putting codes, credentials or private message content into routine logs.
Step 1: prepare senders and server credentials
First, set up the sending domain and approved email sender in Yournotify. Follow the generated DNS instructions and inspect authentication results in a controlled delivered email. For SMS, complete the sender requirements for the intended verification traffic.
Create the application credential under Developer and store it in your server environment or secret store. Do not embed a full API key in a website bundle or mobile binary. Use the current Yournotify API documentation as the request contract.
For applications with an SMTP configuration screen, Yournotify SMTP may fit the existing integration. Choose one delivery path per notification purpose unless your application deliberately coordinates multiple paths and prevents duplicate sends.
Step 2: validate a receipt email in sandbox
Next, the example below is a delivery test, not a payment implementation. Replace the approved sender and test recipient with values from your account. The order reference and amount are demonstration content.
curl -X POST 'https://api.yournotify.com/campaigns/email' \
  -H "Authorization: Bearer $YOURNOTIFY_API_KEY" \
  -H 'Content-Type: application/json' \
  -H 'X-YN-SANDBOX: 1' \
  --data '{
    "name": "Receipt test ORD-1042",
    "from": "YOUR_APPROVED_EMAIL_SENDER",
    "subject": "Payment received for order ORD-1042",
    "status": "running",
    "lists": ["tester@example.com"],
    "text": "Your payment of NGN 15000 for order ORD-1042 is confirmed. View your order in your account.",
    "html": "<h1>Payment received</h1><p>Your payment of NGN 15000 for order ORD-1042 is confirmed.</p><p>View your order in your account.</p>"
  }'
The sandbox header validates the request without delivery or sending charges. Remove it only for a controlled live test. In production, build the receipt from your verified order record and escape customer-controlled values before adding them to HTML.
Also, keep a readable text version. Test long product names, missing optional fields and narrow mobile layouts. The Email API and SMTP guide provides additional delivery setup detail.
Step 3: create the verification challenge on your backend
Then, generate OTP values with a cryptographically secure random generator. Bind each challenge to the intended account or session, destination and purpose. Store an expiry, attempt count and completion state, and use a keyed digest rather than retaining the raw code.
A starting test policy might use a six-digit code, a short expiry, a resend delay and a small incorrect-attempt limit. These are application settings to evaluate against the action’s risk and your observed delivery times, not provider defaults.
OWASP’s authentication guidance covers throttling, consistent error handling and reauthentication for sensitive activity. Apply controls to both challenge requests and verification attempts. Email or SMS delivery alone does not establish a phishing-resistant authentication system.
Finally, consume a successful challenge atomically. Otherwise, two simultaneous submissions may both pass a check before either marks the challenge used. When issuing a replacement, make the active-code rule explicit and test late arrival of the older message.
Step 4: validate OTP delivery
After that, this SMS example uses a demonstration code. Replace the sender and telephone placeholder with approved test values; production codes must come from your challenge service.
curl -X POST 'https://api.yournotify.com/campaigns/sms' \
  -H "Authorization: Bearer $YOURNOTIFY_API_KEY" \
  -H 'Content-Type: application/json' \
  -H 'X-YN-SANDBOX: 1' \
  --data '{
    "name": "Signup verification test",
    "from": "YOUR_APPROVED_SMS_SENDER",
    "status": "running",
    "lists": ["<TEST_PHONE_E164>"],
    "text": "Your Example App code is 482913. It expires in 5 minutes. Do not share this code."
  }'
The message’s stated expiry must match your backend. Keep codes out of URL query strings, analytics events and ordinary logs. Show a masked destination and a visible resend state on the client.
Use the dedicated SMS OTP guide and email OTP guide for complete channel journeys. WhatsApp verification uses an approved authentication template and its documented code field; see the WhatsApp OTP guide.
Step 5: make retries deliberate
Next, record the notification requirement with the business event. A queue or transactional outbox can then deliver it without making the user wait for every network request in the page response.
Use a stable internal key such as payment-confirmed:ORD-1042 to track whether your application already requested that notification. This is your application design; do not assume an undocumented idempotency header is supported by every campaign endpoint.
If a create request times out, investigate whether a campaign was created before submitting again. Store the returned campaign reference when available. Distinguish a validation error from a temporary network problem and from an accepted request whose final delivery result is still pending.
For OTP resends, coordinate the delivery retry with the challenge policy. A technical retry of the same delivery and a user-requested new challenge are different operations.
Step 6: handle callbacks and reporting safely
Finally, configure the relevant channel under Developer Webhook and implement the current callback contract. Validate incoming requests according to that contract, process repeated notifications safely and keep the receiving endpoint fast enough for the expected traffic.
Do not use a message-status callback as authorisation for a payment or login. Map it to the correct message reference and update delivery state. The application remains responsible for the confirmed business outcome.
When inspecting a failure, record a safe correlation reference, status and error information. Redact personal data before sharing logs. Support staff usually need to find the notification and understand its state, not read the user’s OTP.
Release with a test matrix
| Test | Expected behaviour |
|---|---|
| Valid sandbox request | Payload validates without a real send |
| Invalid sender or recipient | Error is handled and surfaced to the operator |
| Repeated business event | Application does not create an unintended duplicate notification |
| Timeout after submission | Application reconciles before blindly resending |
| Expired or incorrect OTP | Challenge is rejected and attempt rules apply |
| Two simultaneous valid submissions | Challenge is consumed only once |
| Changed destination | Old challenge cannot authorise the new destination |
| Repeated callback | Delivery state remains consistent |
Test controlled live delivery after sandbox validation, including representative Nigerian networks and the mailbox clients your audience uses. Verify the complete user journey rather than stopping at an HTTP success response.
Measure the application result
For verification, measure eligible attempts, successful completions, time to completion and resends. For receipts, review delivery failures and support requests about missing or incorrect information. Keep message acceptance, delivery and application outcome separate in dashboards.
In an illustrative example, 900 successful verifications from 1,000 eligible attempts gives a 90% completion rate. If there were 1,100 billable sends, calculate cost per completion using total sending cost divided by 900. These figures teach the method; they are not a promised delivery result.
Frequently asked questions
Does Yournotify generate and validate my application’s OTP automatically in these examples?
The campaign examples deliver the message. Your application generates, binds, expires and validates the challenge described here.
Can I place the API key in a mobile app?
Keep the workspace key on a trusted server. Use the documented restricted client flows only for the capabilities they are designed to expose.
Can I use the same code for signup and password recovery?
Keep each challenge tied to its purpose. A code issued for one action should not silently authorise another.
Should a receipt be retried immediately after every timeout?
First reconcile the uncertain result where possible. A timeout can occur after the provider accepted the request, so an immediate new create request can duplicate delivery.
Ship one complete notification journey
Open the Yournotify documentation, prepare your senders and validate a sandbox request. Then test the application event, delivery, failure handling and completed user action together. Start with one dependable journey and reuse the integration deliberately across the rest of your product.