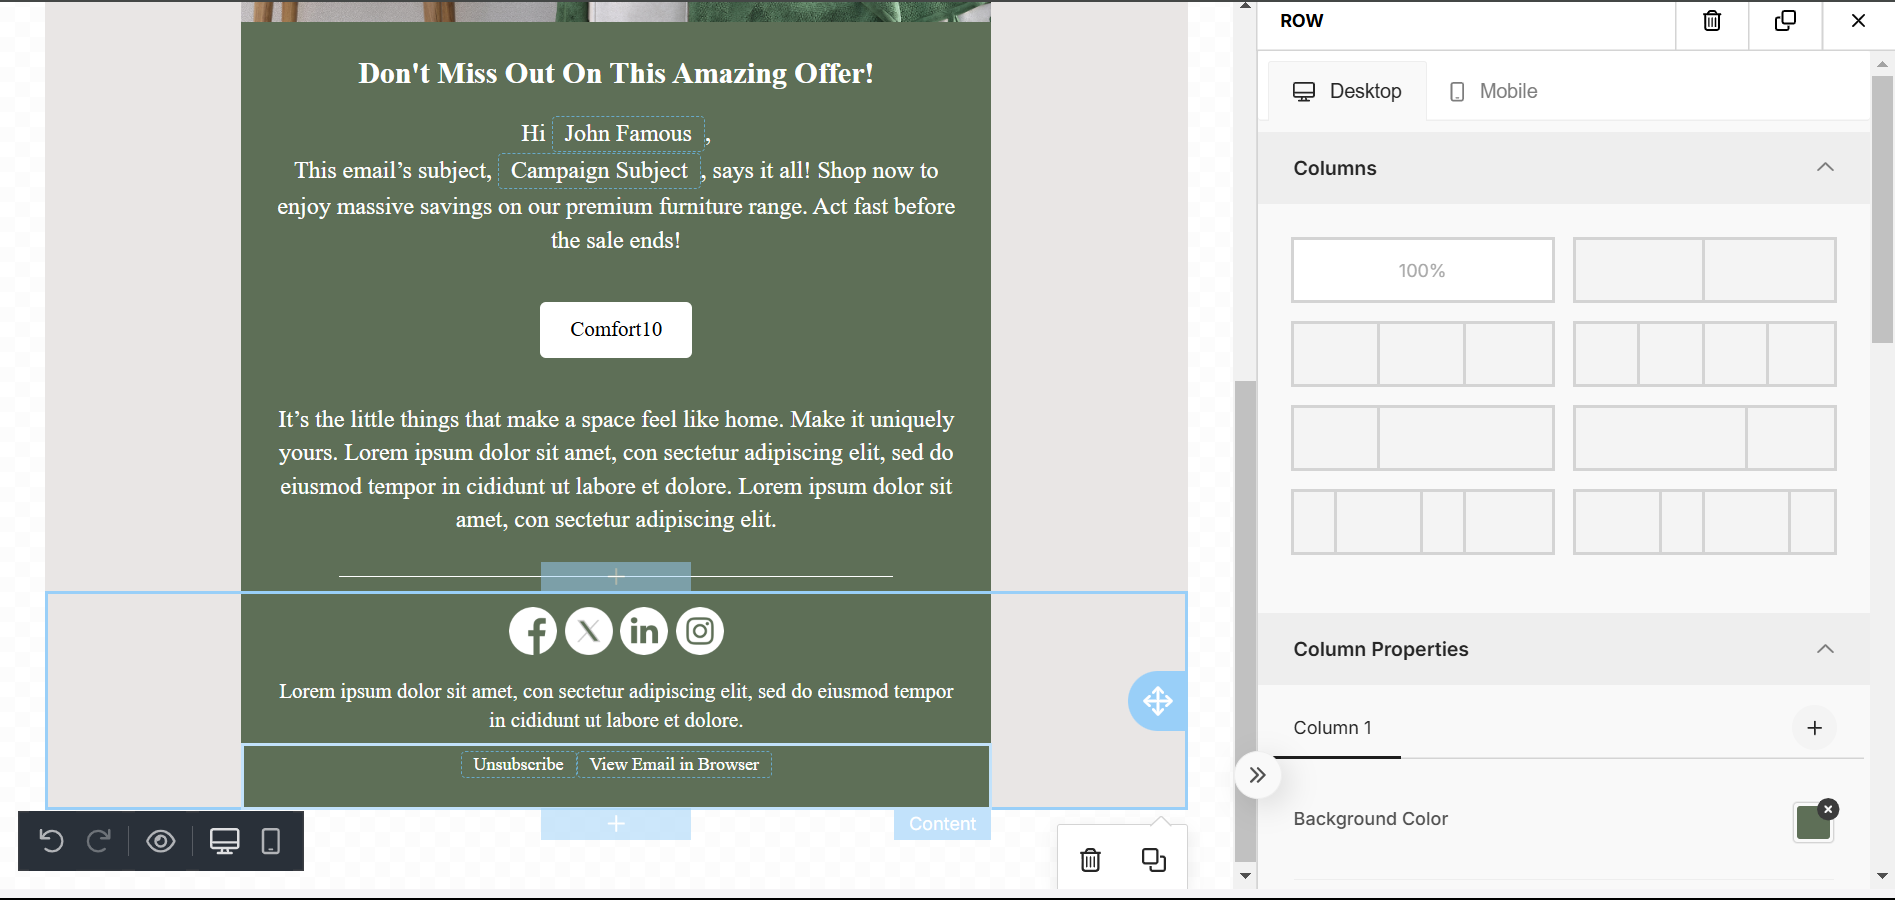
Personalization is essential for driving engagement in your email campaigns. Merge Tags help customize your messages by inserting specific information about your recipients. Using Merge Tags can make your communication more relevant and increase interaction. Below is a guide on how to use each Merge Tag for your email campaign on yournotify.
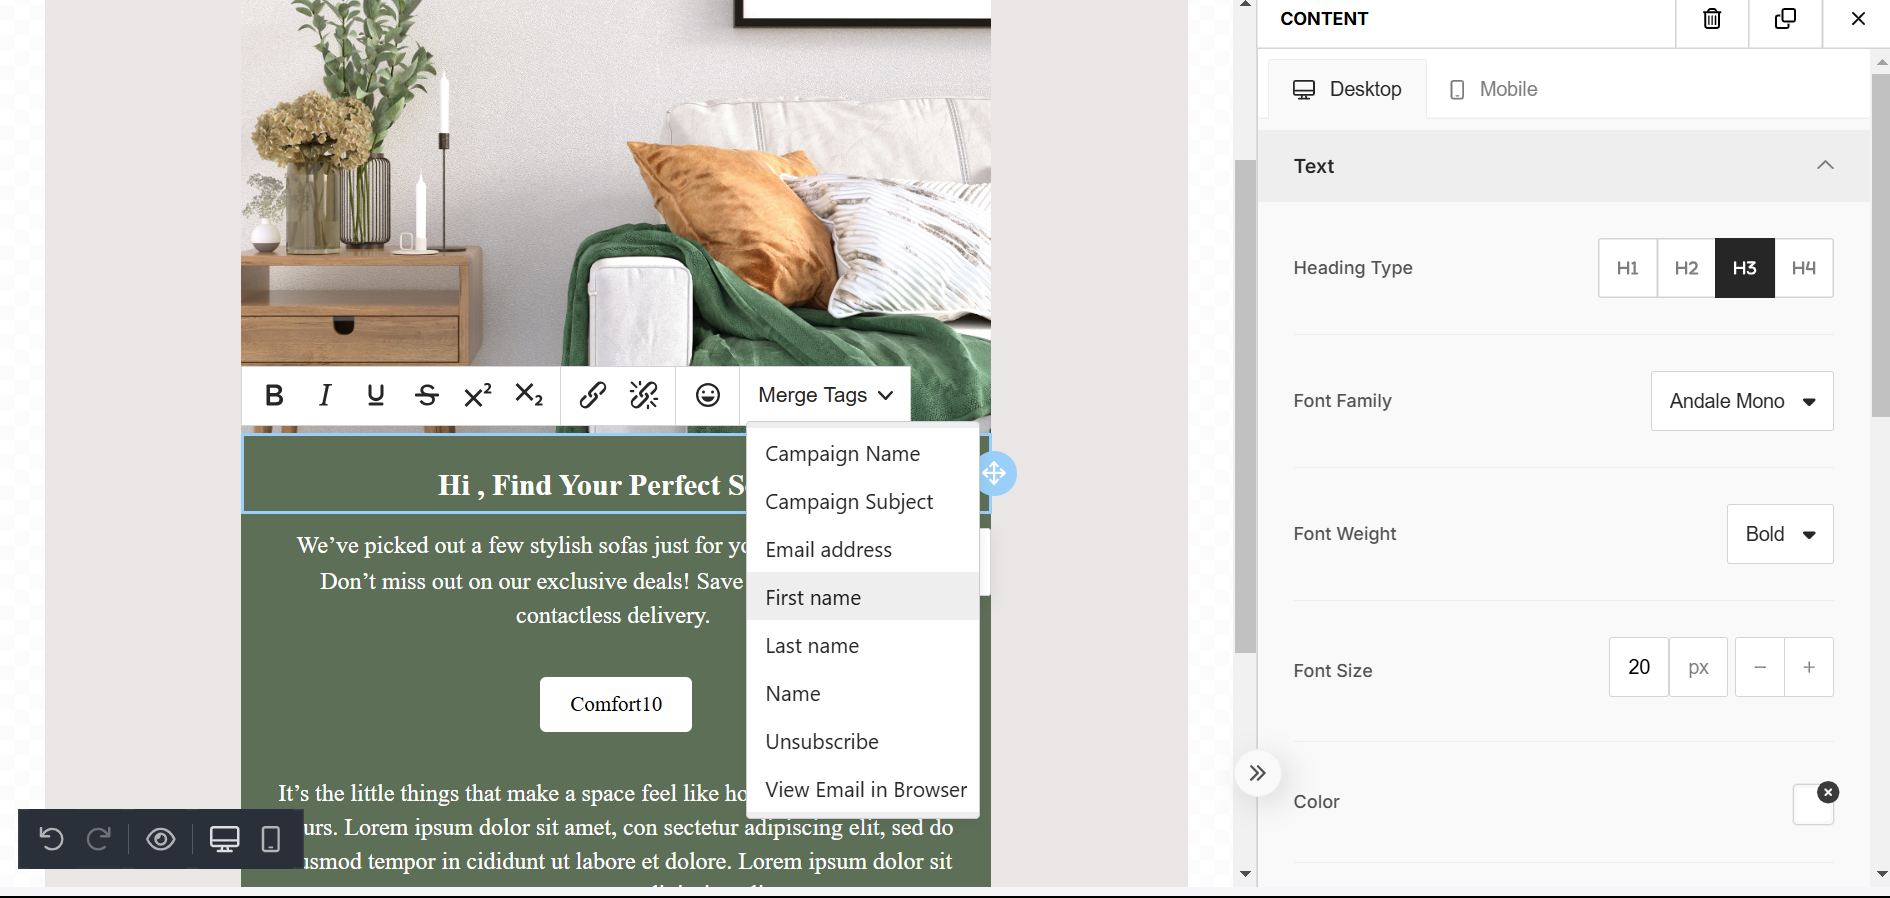
How To Use First Name Merge Tag: The First Name Merge Tag adds a personal touch by automatically inserting the recipient’s first name into the email content. This allows you to greet each recipient individually, making the message feel more tailored and engaging.
STEP 1: Go to the area you want to add your merge tag, select ‘Merge Tags’ and click on ‘First Name’
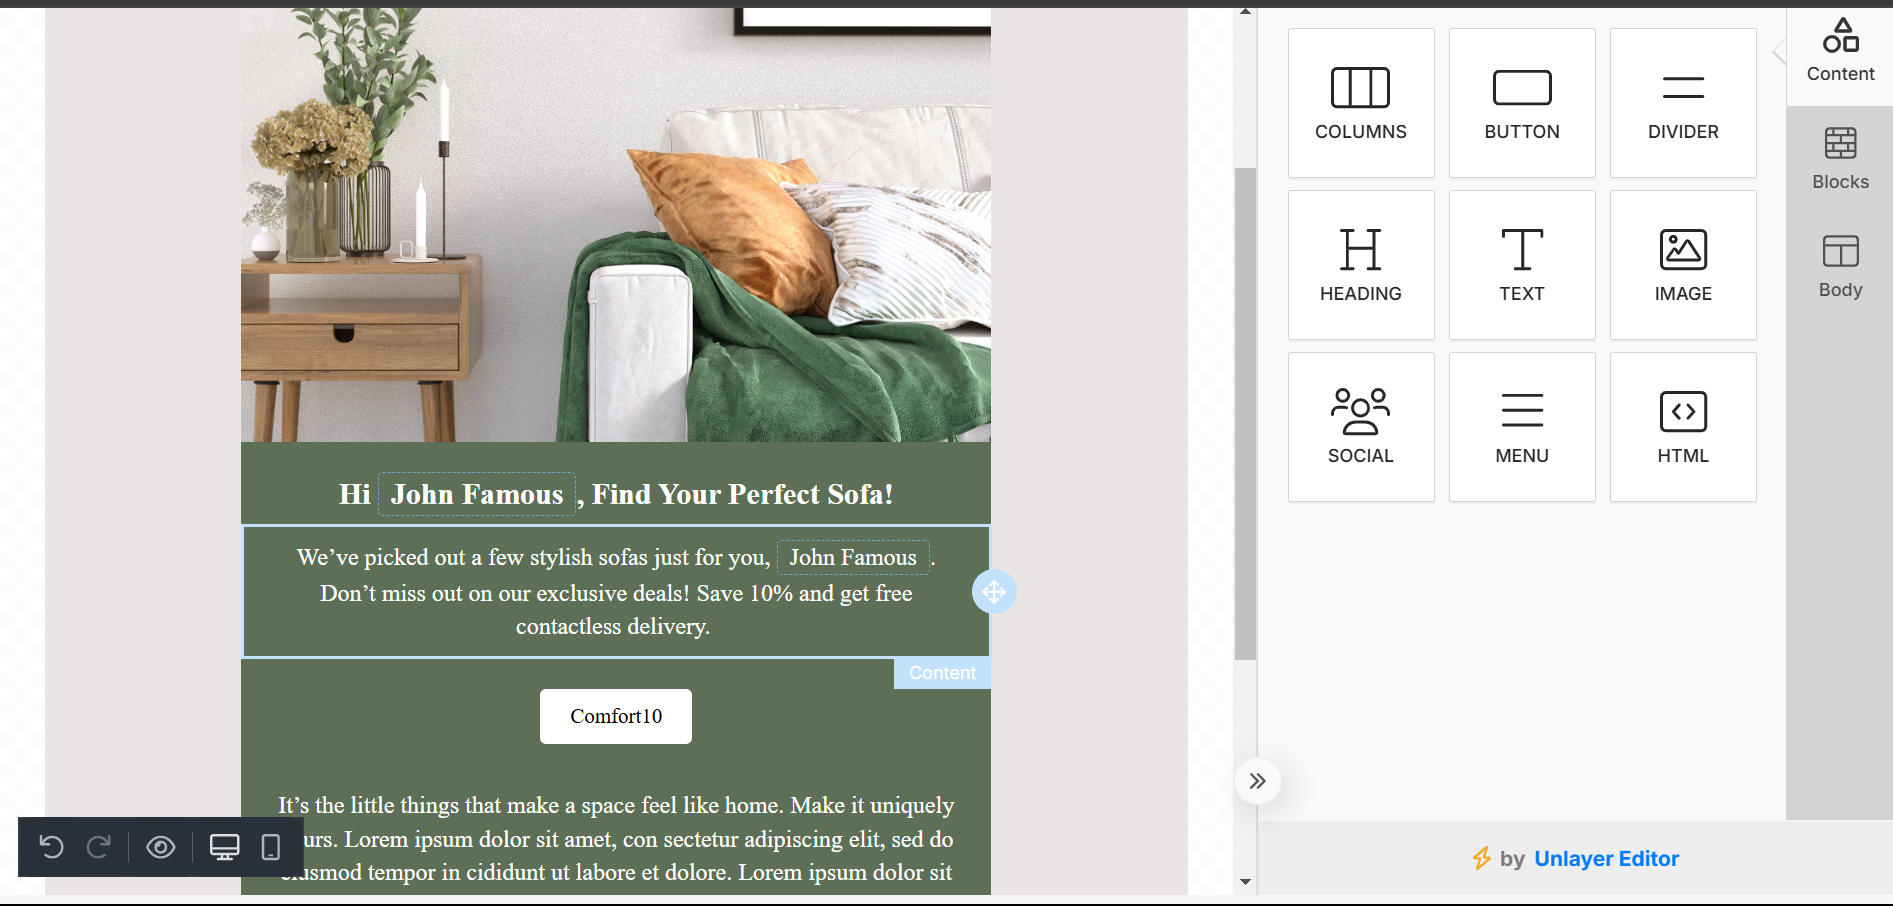
STEP 2: Once the email is opened, each subscriber will automatically see their fist name replacing the tag.
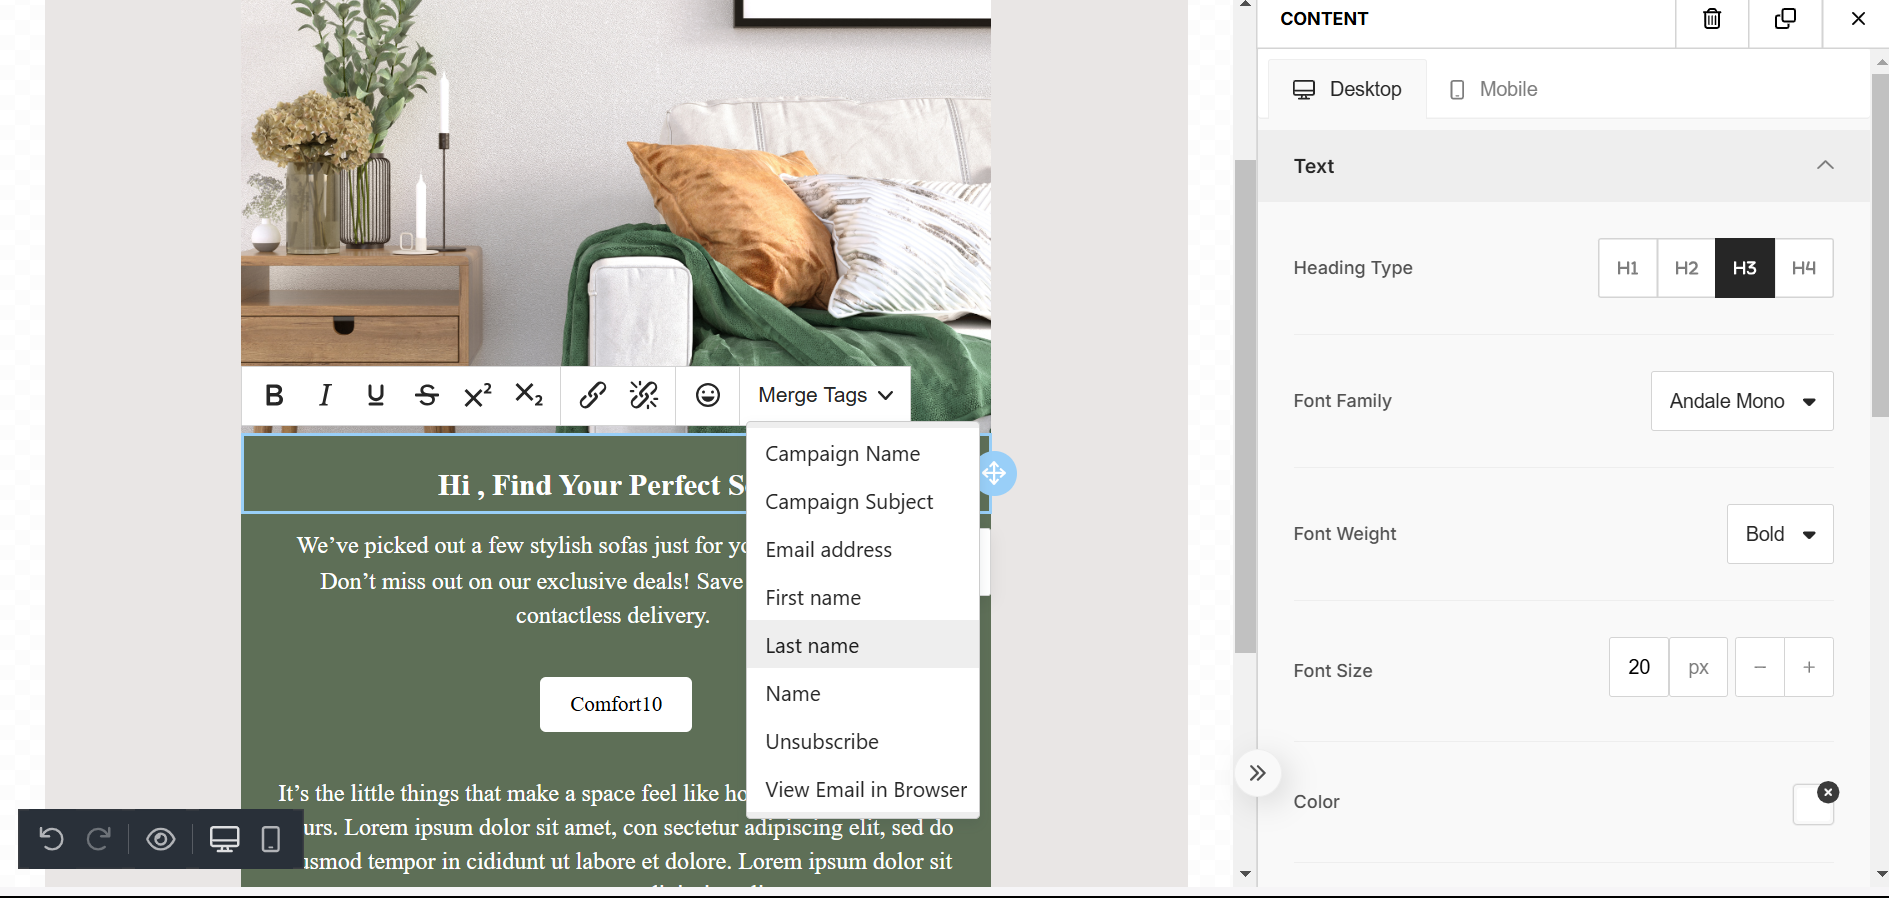
How To Use Last Name Merge Tag: The Last Name Merge Tag personalizes your message by dynamically inserting the recipient’s last name into the email content. This adds a professional and customized touch to your communication.
STEP 1: Go to the area you want to add your merge tag, select ‘Merge Tags’ and click on ‘First Name’
STEP 2: Once the email is opened, each subscriber will automatically see their fist name replacing the tag.

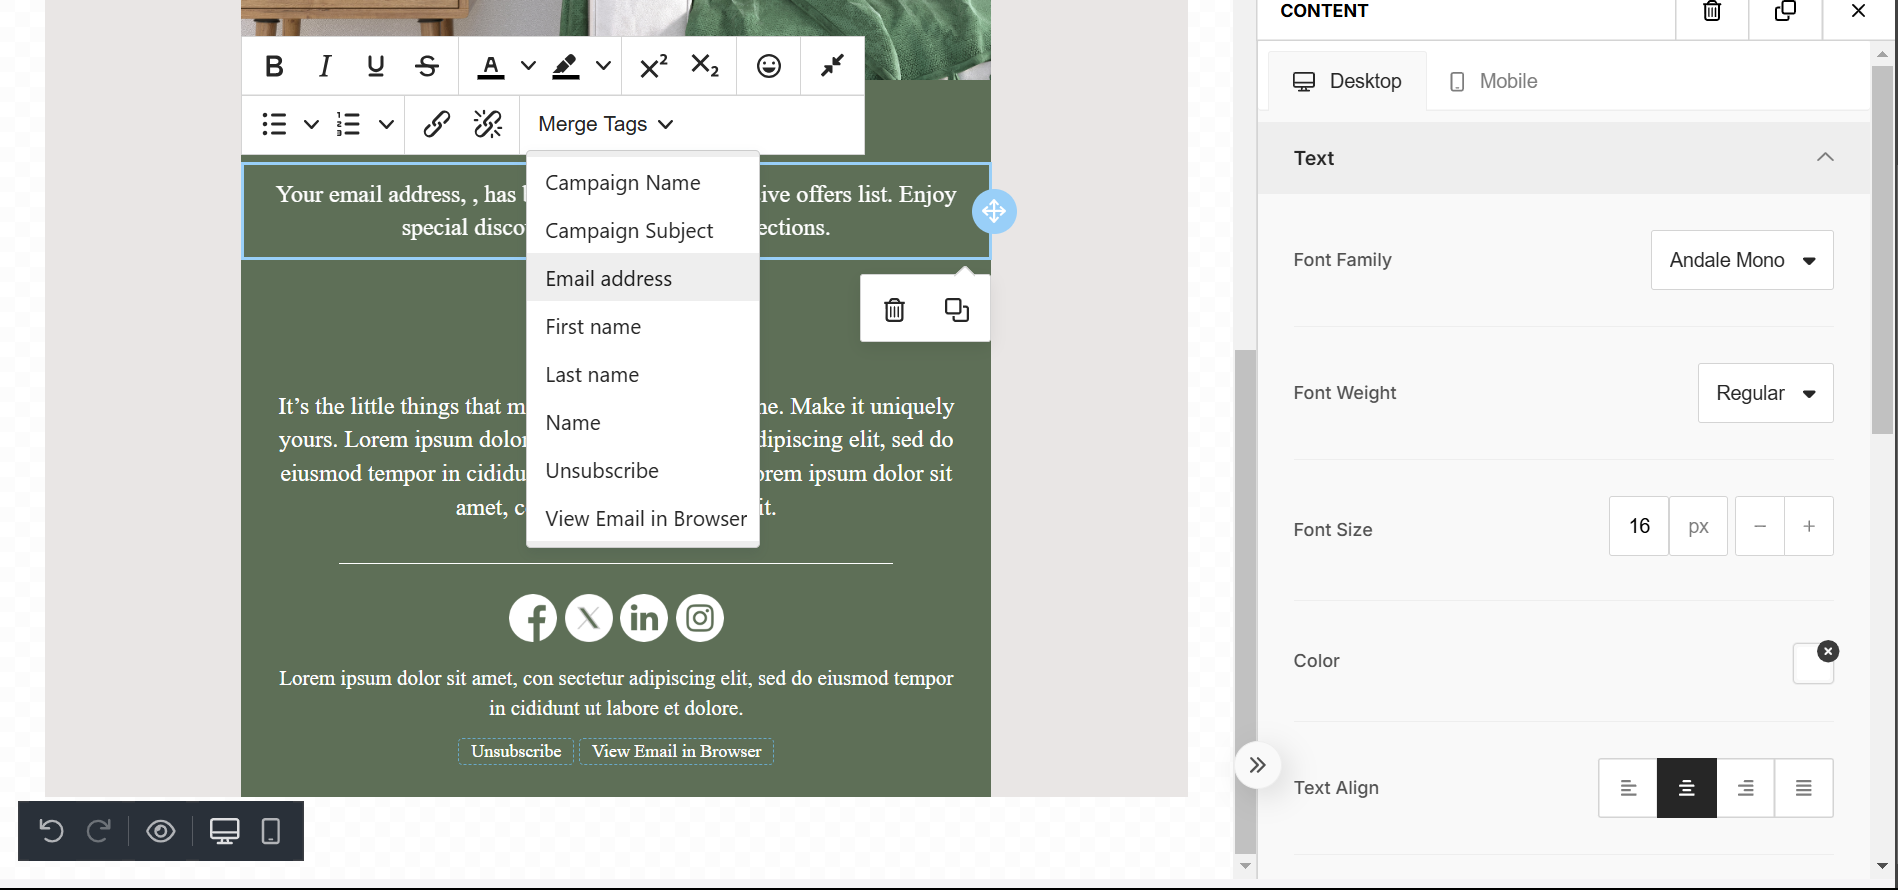
How to use Email Address Merge Tag: The Email Address Merge Tag automatically inserts the recipient’s email address into the email content. This tag is particularly useful for confirming registration details, verifying account updates, or creating a personalized touch in your communication.
STEP 1: Go to the area you want to add your merge tag, select ‘Merge Tags’ and click on ‘Email Address’
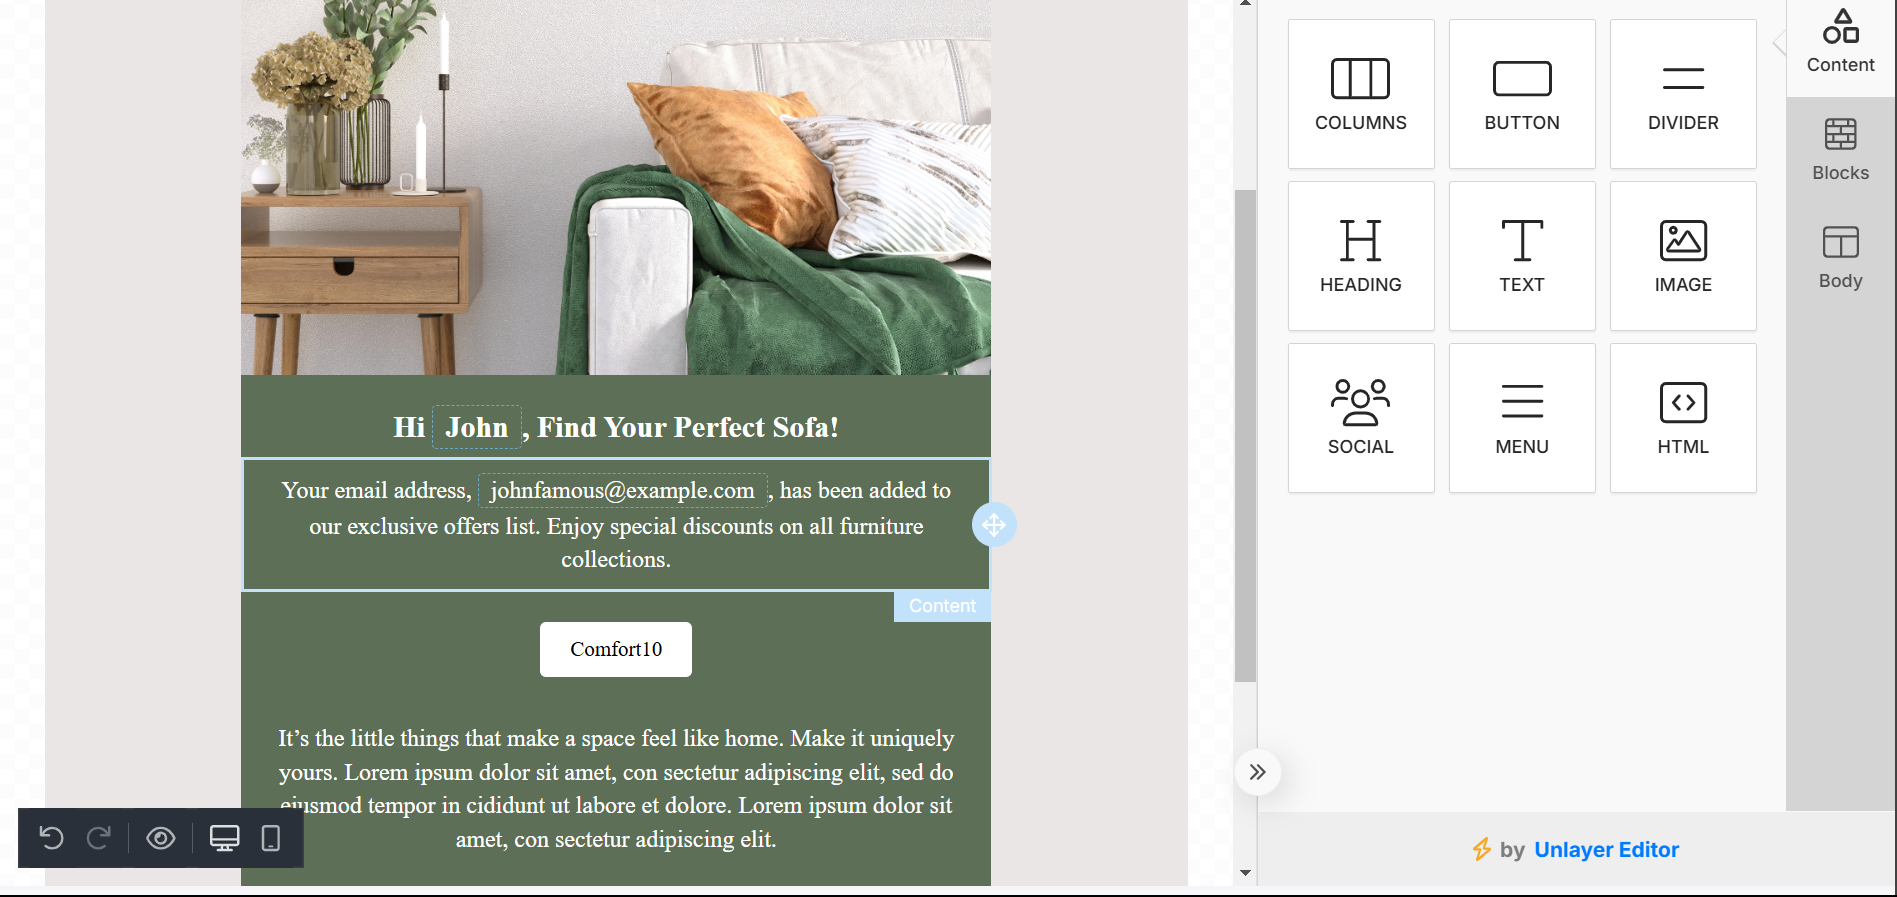
STEP 2: Once the email is opened, each subscriber will automatically see their email address replacing the tag.
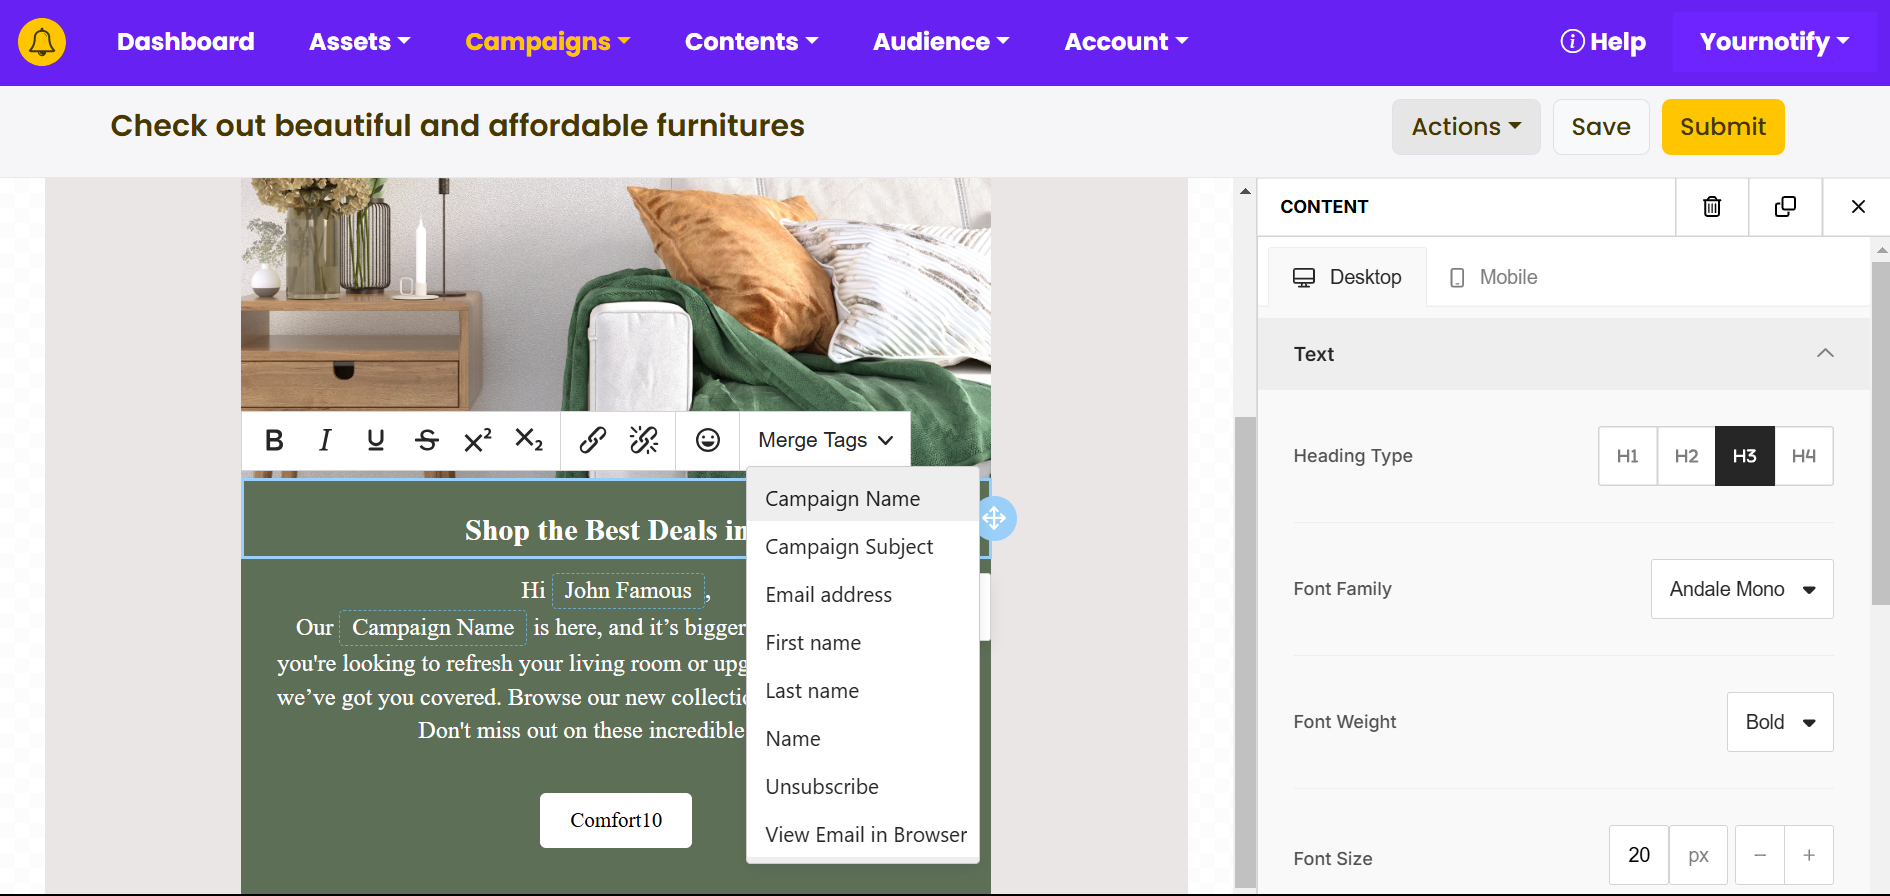
How To Use Campaign Name Merge Tag: The Campaign Name Merge Tag inserts the specific title of your email campaign directly into the email content. This tag allows you to reference the campaign name seamlessly, ensuring that your message feels consistent and relevant.
STEP 1: Go to the area you want to add your campaign name, select ‘Merge Tags’ and click on ‘Campaign Name’
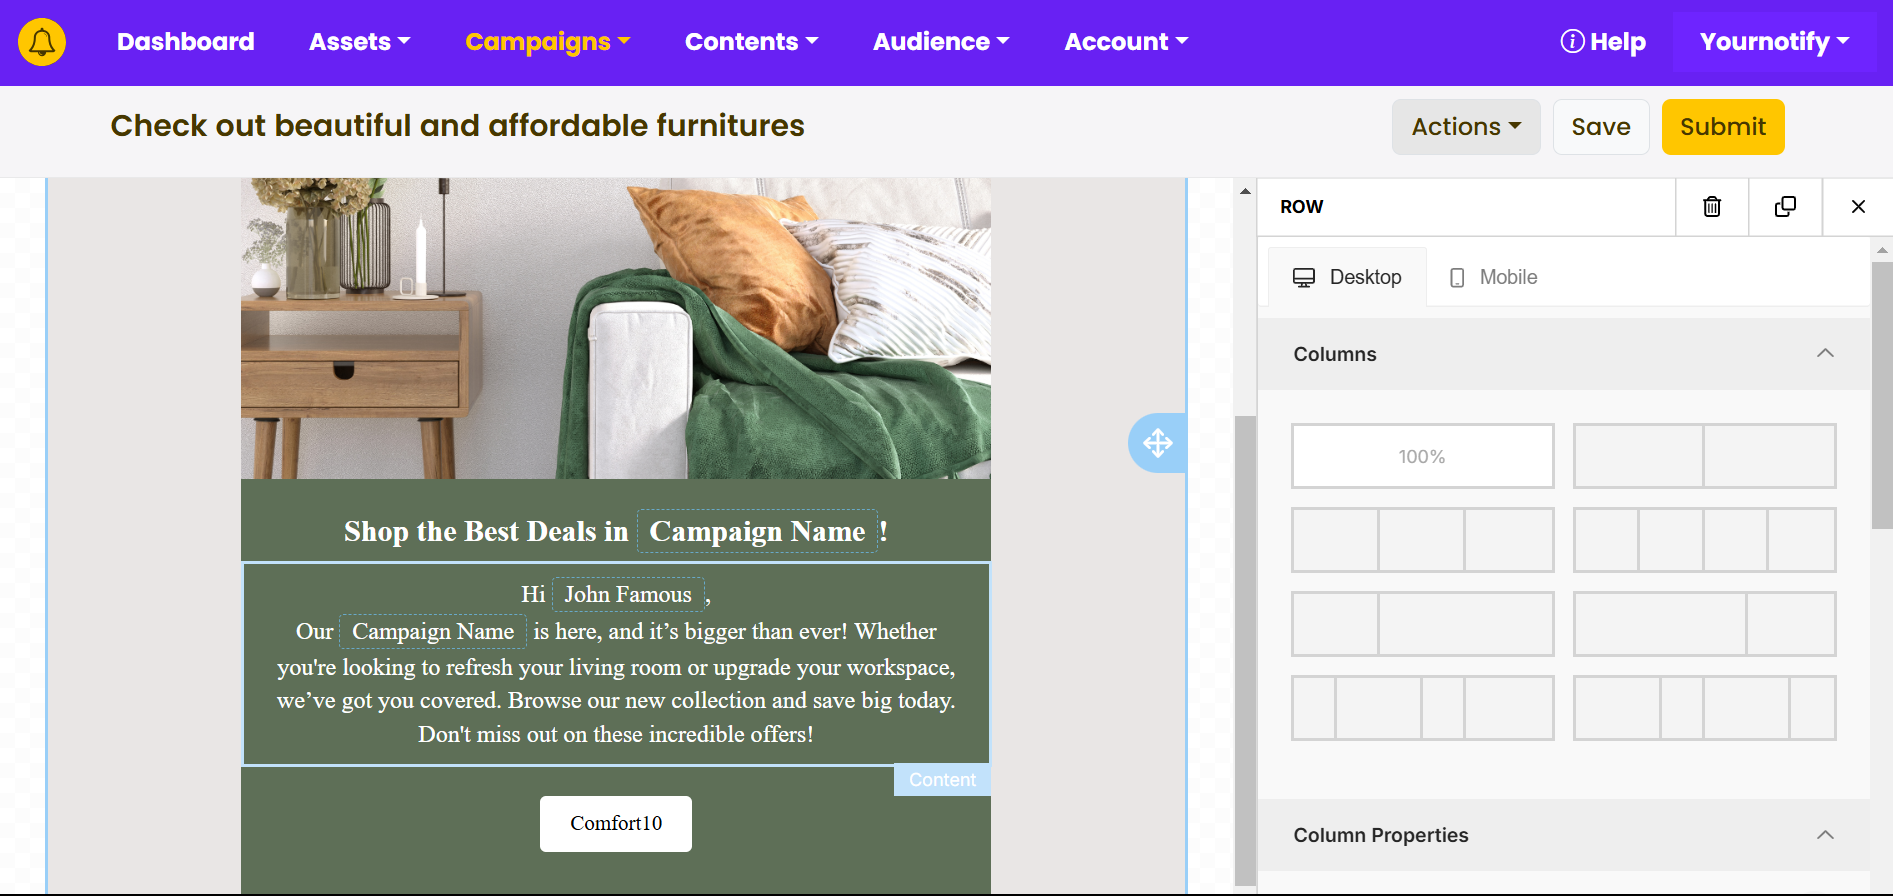
STEP 2: Once the email is opened, each subscriber will automatically see the campaign name replacing the tag.
How To Use Campaign Subject Merge Tag: The Campaign Subject Merge Tag dynamically inserts the subject line of your email campaign into the email content. This ensures the message is consistent with the campaign’s theme and purpose.
STEP 1: Go to the area you want to add your campaign subject, select ‘Merge Tags’ and click on ‘Campaign Subject’
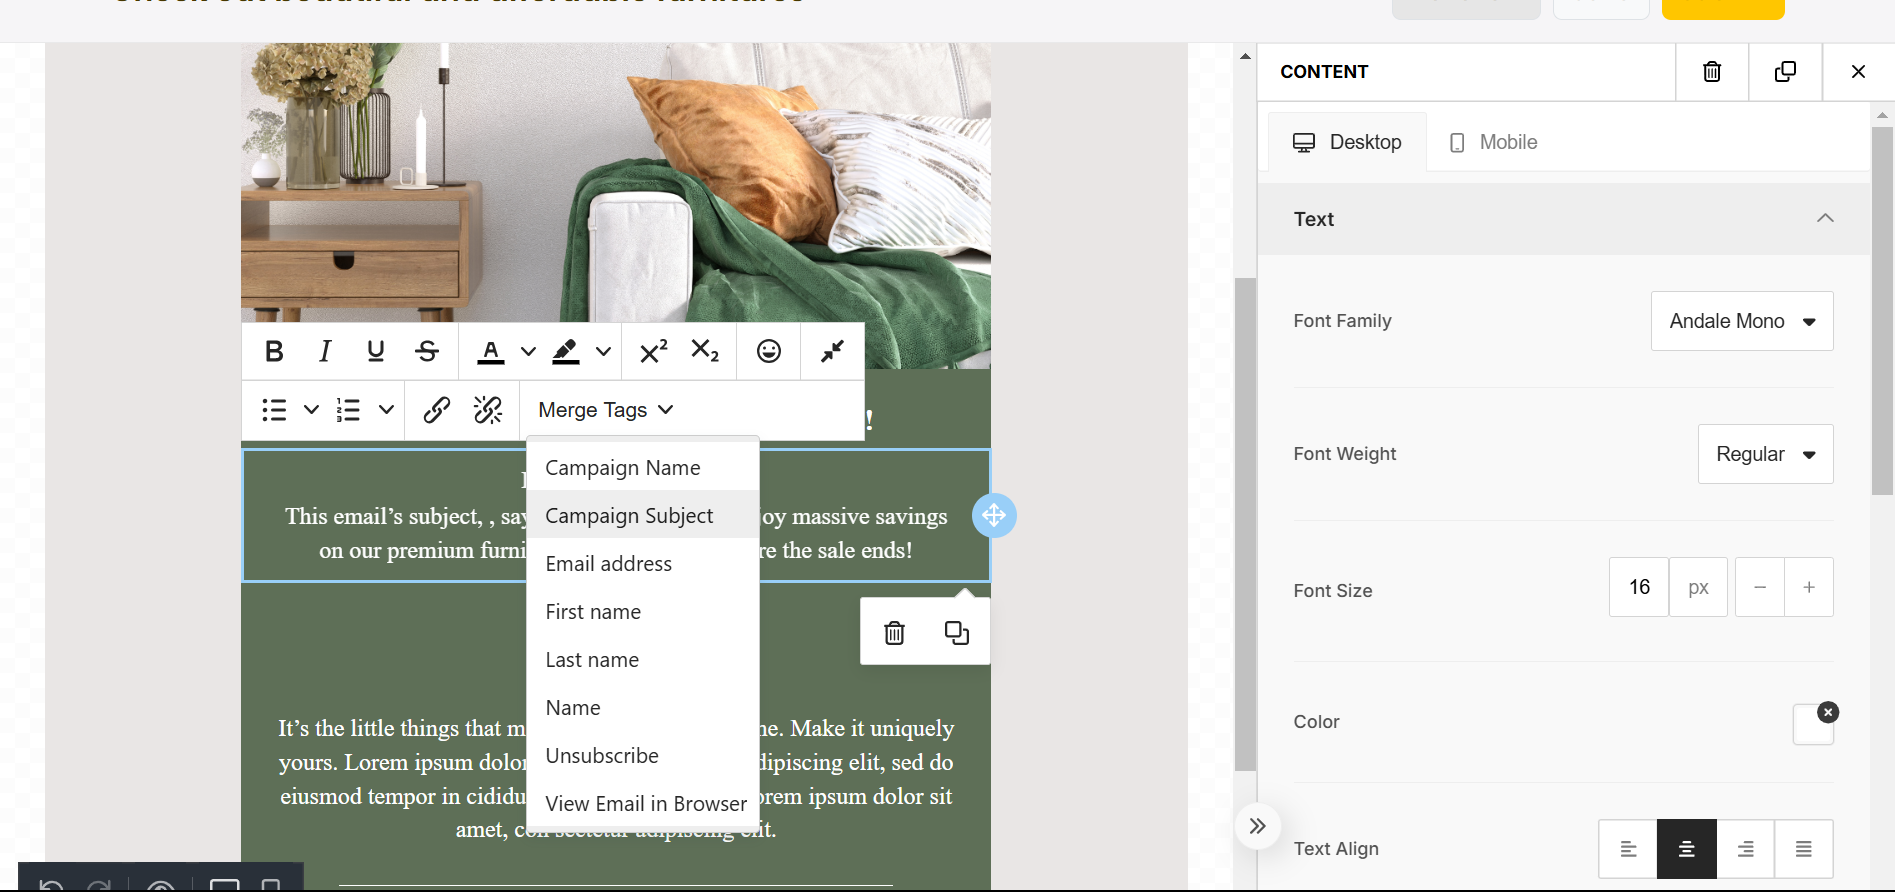
STEP 2: Once the email is opened, each subscriber will automatically see the campaign subject replacing the tag.
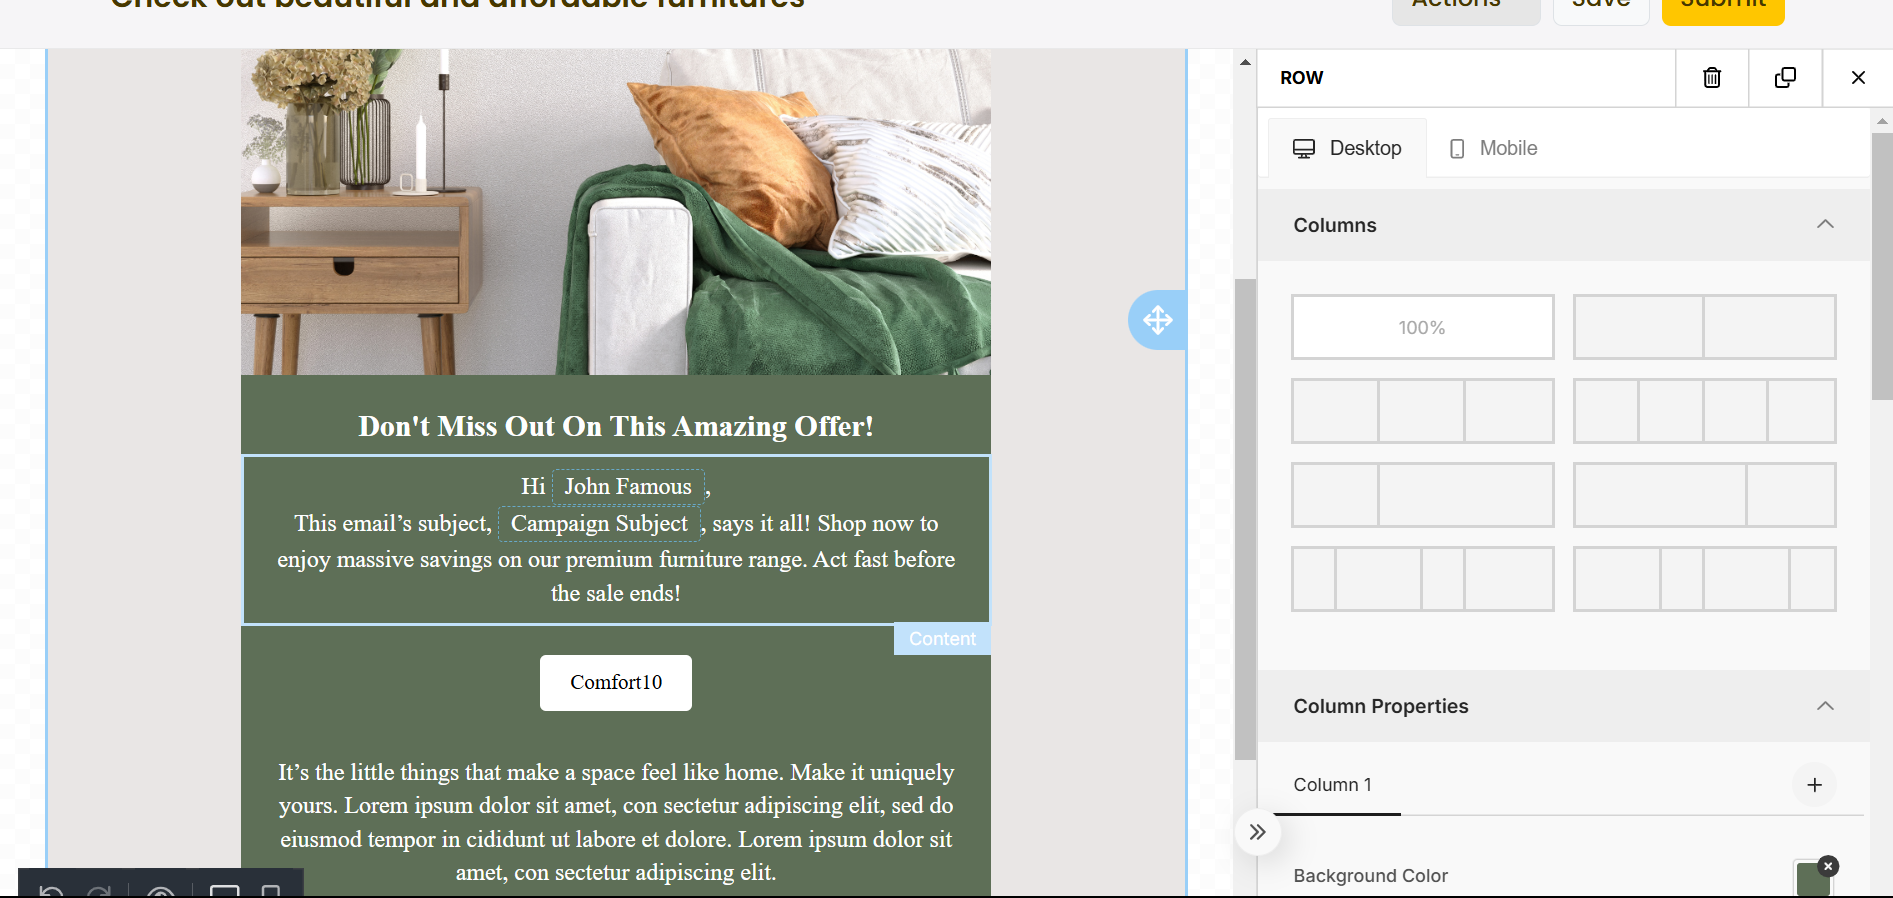
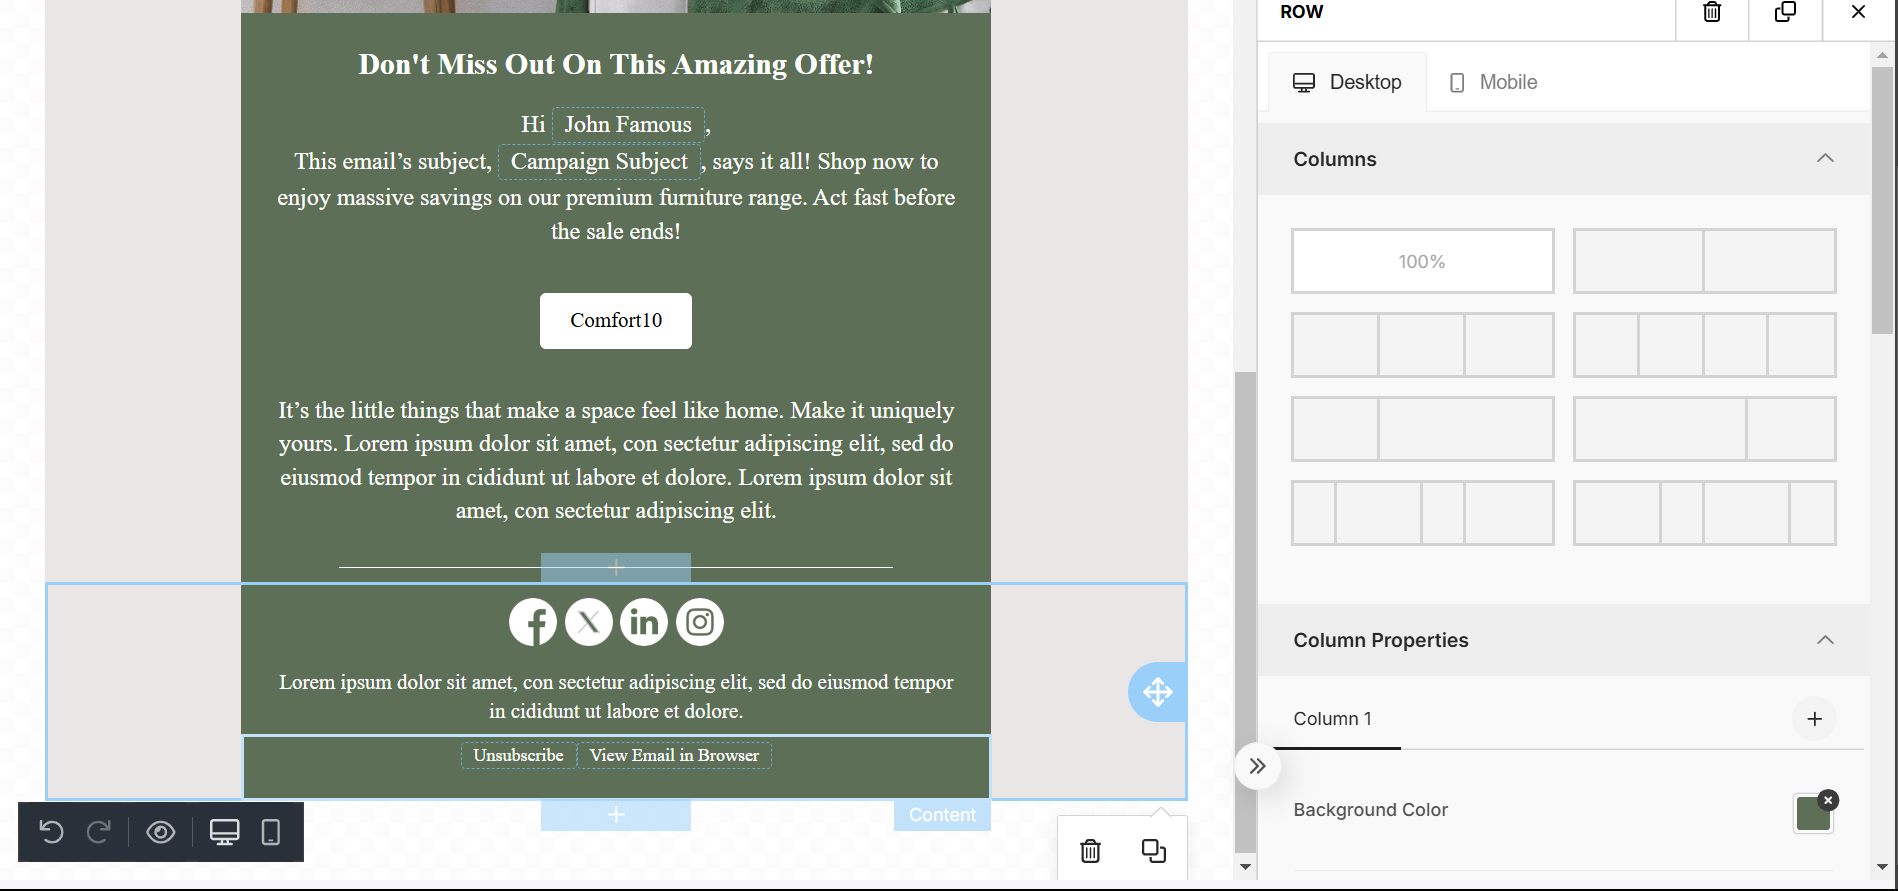
How To Add The Unsubscribe Merge Tag: The Unsubscribe Merge Tag allows you to include an easy-to-find link for recipients to opt out of receiving further emails. This tag is essential for email campaigns as it helps comply with email marketing regulations and offers recipients the option to manage their preferences.
STEP 1: Go to the area where you want to add the unsubscribe link, select ‘Merge Tags’, and then click on ‘Unsubscribe’.

STEP 2: Once the email is sent, each recipient will automatically have the option to unsubscribe by clicking the unsubscribe link included in the email.
How To Add View Email in Browser Merge Tag: The View Email in Browser Merge Tag allows you to insert a link that lets recipients view the email in their web browser. This is particularly useful in case the email does not render properly in the recipient’s inbox due to email client issues or settings.
STEP 1: Go to the area where you want to add the View Email in Browser link, select ‘Merge Tags’, and then click on ‘View Email in Browser’. 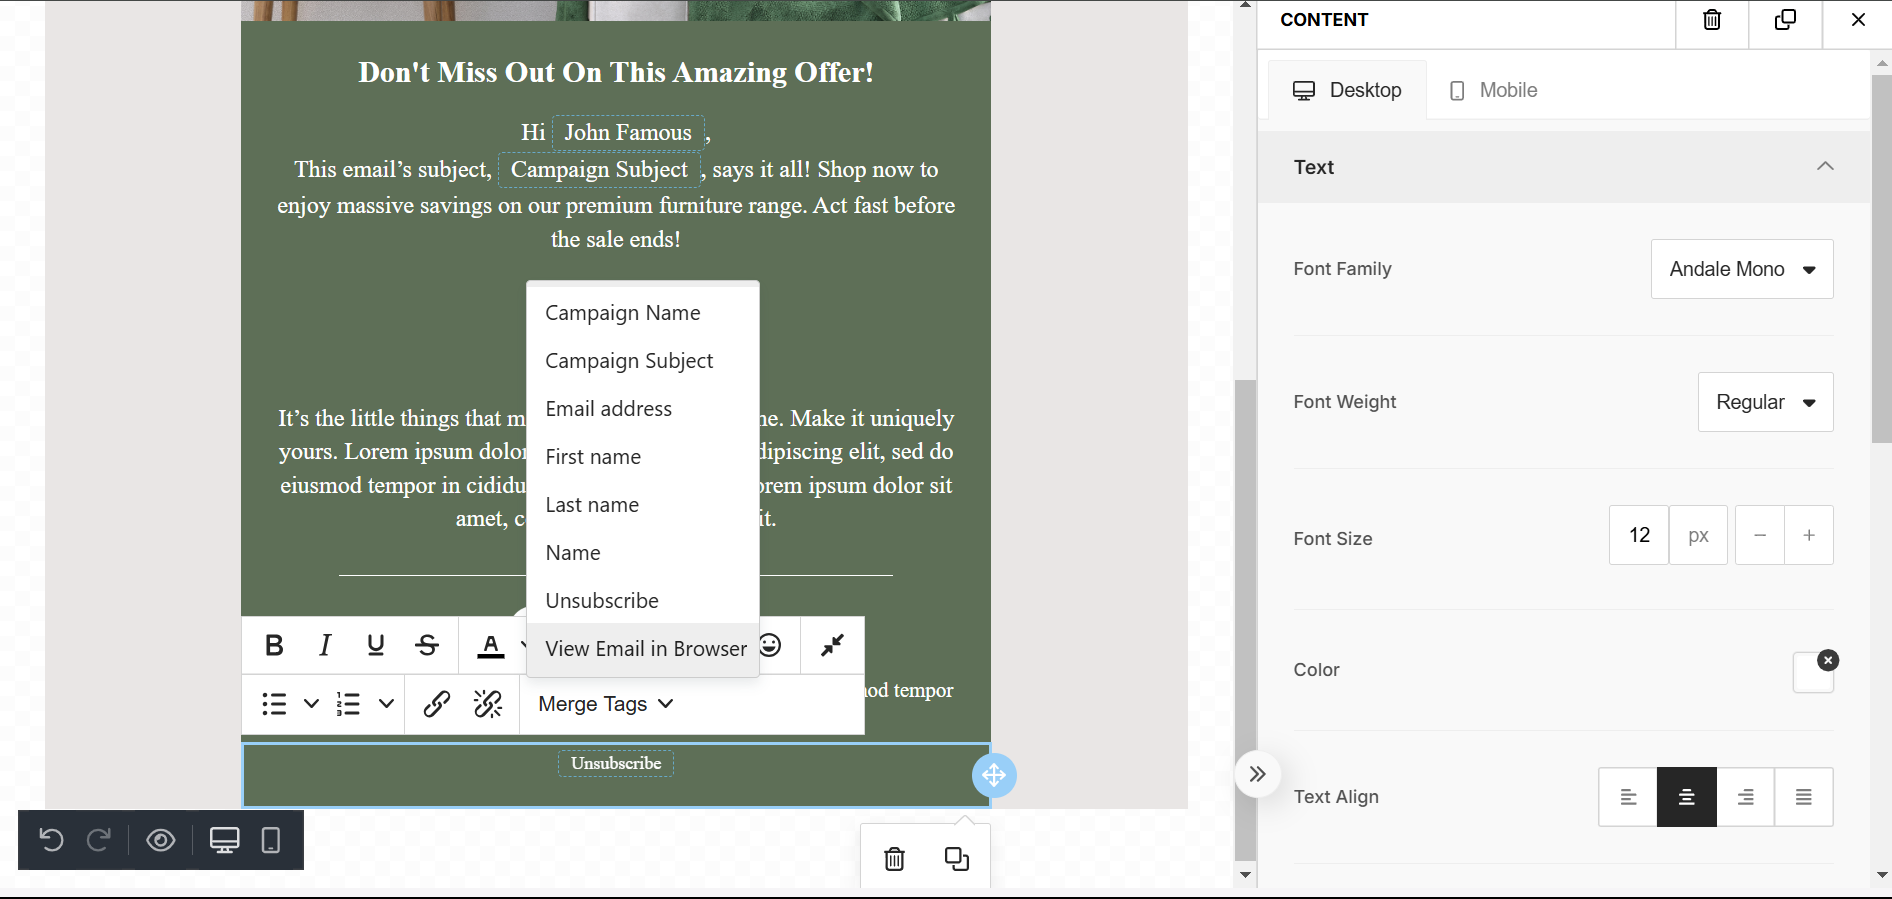
STEP 2: Once the email is sent, each recipient will automatically have the option to view the email in their browser by clicking the link provided.
